Your Vacuum: The Unsung Hero of Home Cleanliness
Few appliances work as tirelessly and are as central to effective house cleaning as your vacuum cleaner. It's the workhorse that battles dust, pet hair, and debris daily, keeping your living spaces fresh and healthy. Yet, too often, we take these powerful machines for granted, only noticing them when their suction wanes, their motor strains, or they simply refuse to power on. But what truly keeps these workhorses running at their best, day in and day out? The answer is consistent, informed maintenance. Neglecting your vacuum isn't just an inconvenience; it can lead to costly repairs, diminished cleaning power, and a significantly shortened lifespan for an essential investment.
At Clean & Cleaner, we believe that understanding and implementing proper vacuum maintenance is a cornerstone of effective home maintenance. It's not about complex repairs, but rather a series of simple, actionable steps that anyone can follow. Think of it as preventative care for your cleaning ally. By dedicating a little time to its upkeep, you ensure it continues to deliver the powerful performance you rely on for everything from routine tidying to serious deep cleaning projects.

Understanding Your Vacuum's Anatomy: The Basics of Airflow
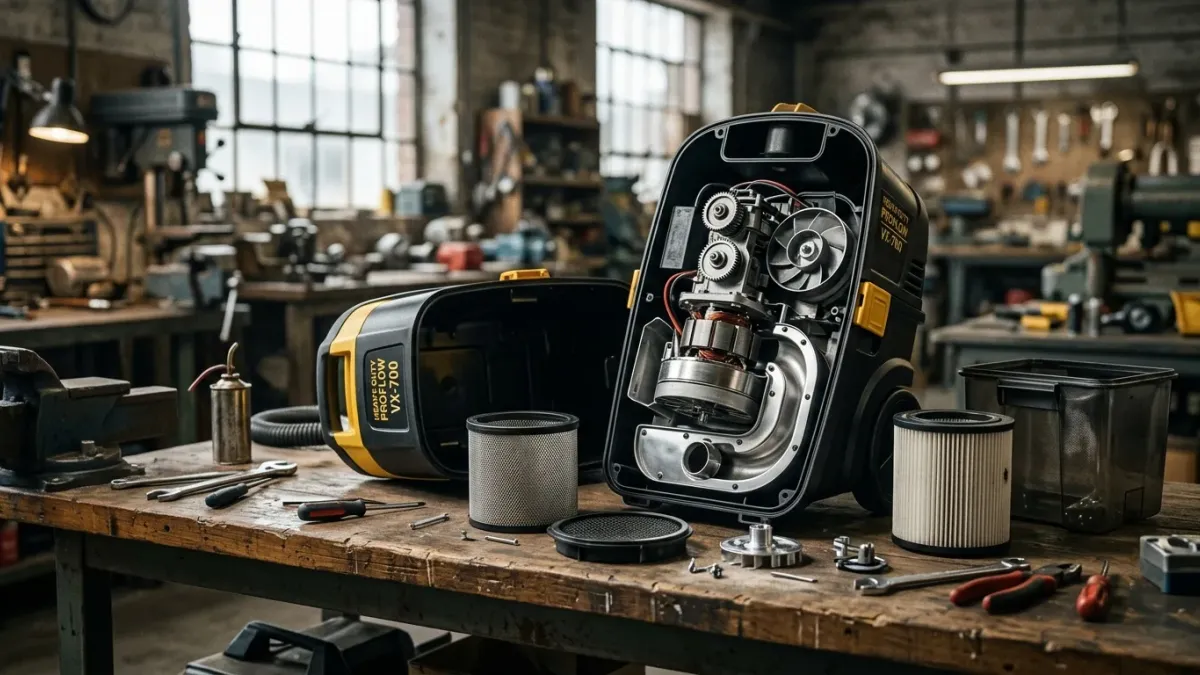
To properly maintain your vacuum, it’s crucial to understand how it works. At its core, a vacuum cleaner operates by creating suction, pulling air and debris through a system of filters and into a collection bin or bag. This airflow is the heart of its performance. Any obstruction or inefficiency in this path – be it a clogged filter, a jammed brush roll, or a blocked hose – directly translates to a loss of suction and increased strain on the motor.
Key components vital to this airflow include the intake nozzle, the brush roll (or agitator bar), the hose, the dirt collection system (bag or canister), and the filtration system. Different types of vacuums, such as uprights, canisters, stick vacs, and robotic cleaners, all share these fundamental principles, though their designs vary. For example, an upright vacuum often has its brush roll and motor integrated into the main head, while a canister vacuum separates the motor unit from the cleaning head, offering different access points for maintenance. I believe that understanding these basic mechanics is the first step towards truly effective upkeep.
The Regular Routine: Simple Steps for Consistent Performance
Consistent, minor maintenance is your best defense against major vacuum issues. These are the quick checks and cleanings you should integrate into your regular house cleaning routine. Honestly, these simple tasks take mere minutes but yield significant returns in performance and longevity.
Emptying the Dirt Receptacle: A Daily Must
Whether your vacuum uses bags or a bagless canister, emptying it regularly is paramount. For bagless models, aim to empty the canister after every use, or when it reaches the "max fill" line. An overfilled canister significantly restricts airflow, causing your vacuum to work harder and clean less effectively. For bagged models, don't wait until the bag is bursting; change it when it's about two-thirds full, especially if you have pets or do a lot of vacuuming.
Cleaning the Brush Roll: Freeing It from Debris
The brush roll is the front line of defense against dirt and debris, especially hair. Long hair, threads, and even small strings can quickly wrap around the brush roll, impeding its rotation and reducing its ability to agitate carpet fibers. For example, imagine this situation: you've just finished vacuuming, but your vacuum seems to be just pushing pet hair around. A quick flip over reveals a brush roll completely matted with hair. This not only makes your vacuum less effective but also puts immense strain on the belt and motor. Based on my experience, a simple pair of scissors or a seam ripper can be invaluable here. Carefully cut through tangled hair and pull it away. Do this at least once a month, or more frequently if you have long-haired occupants or pets.
Inspecting the Hose and Attachments: Checking for Clogs
Periodically detach the hose and visually inspect it for blockages. Use a broom handle or a long, slender object (never your hand) to dislodge any obstructions. Similarly, check your attachments, especially crevice tools and upholstery brushes, for any trapped debris. A blocked hose can mimic a motor issue, but often it's a simple fix. This is one of those cleaning tips that can save you a call to a repair shop.
Deep Dive Maintenance: Quarterly and Bi-Annual Care
While daily checks are vital, certain components require less frequent but more thorough attention. These deeper maintenance tasks are critical for sustaining your vacuum's peak performance and extending its life significantly.
Filter Cleaning and Replacement: The Lungs of Your Vacuum
Your vacuum’s filters (pre-motor and post-motor/HEPA) are designed to trap dust and allergens, protecting the motor and ensuring clean exhaust air. Most modern vacuums have washable filters, which should be rinsed under cold water until the water runs clear, then allowed to air dry completely (at least 24 hours) before reinstallation. Never put a damp filter back into your vacuum! Non-washable filters, or those that are heavily soiled and no longer respond to cleaning, need to be replaced. Refer to your vacuum's manual for specific filter types and replacement intervals – typically every 3-6 months for washable filters and annually for HEPA filters. This is crucial for maintaining both suction power and air quality.
Belt Inspection and Replacement: The Power Transfer
The belt drives the brush roll, and over time, it can stretch, crack, or break. A stretched belt won't effectively spin the brush roll, leading to poor cleaning performance on carpets. A broken belt means no brush roll action at all. Turn off and unplug your vacuum, then access the brush roll area to inspect the belt. If it appears worn, stretched, or cracked, it's time for a replacement. Most belts are inexpensive and relatively easy to replace, often requiring just a screwdriver. Always use a genuine replacement belt specified for your vacuum model to ensure proper fit and tension.
Wheel and Caster Cleaning: Smooth Operation
Small wheels and casters on the vacuum head or body can accumulate hair and debris, making your vacuum harder to push and potentially scratching floors. Use a small brush or a pair of tweezers to remove any trapped gunk. Lubricating the axles sparingly with a silicone spray can also help maintain smooth movement, but be careful not to get lubricant on the rubber parts of the wheels.
Troubleshooting Common Issues and When to Call a Pro
Even with diligent maintenance, issues can arise. Knowing how to troubleshoot common problems can save you time and money. However, it's equally important to know when a problem is beyond DIY repair and warrants professional attention.
Loss of Suction: The Most Common Complaint
When your vacuum loses suction, always start with the easiest fixes: Is the bag full or canister overflowing? Is the filter clogged? Is the hose blocked? Is the brush roll jammed? Check all these areas first. Often, the solution is as simple as emptying a bag or removing a hairball. If these basic checks don't resolve the issue, consider a deeper internal clog or a motor problem.
Strange Noises or Burning Smells
Any unusual noises, such as grinding, squealing, or whining, or a burning smell, are red flags. A grinding noise often indicates a foreign object lodged in the brush roll or fan, or a failing bearing. A burning smell usually points to an overworked motor or a slipping/broken belt. Immediately turn off and unplug the vacuum. Inspect for visible obstructions or belt issues. If the smell persists or the noise is severe after basic checks, it's best to consult a professional. Continuing to operate a vacuum with these symptoms can lead to irreversible motor damage.
When to Seek Professional Help
While many maintenance tasks are DIY-friendly, some issues require expertise. If you've performed all the recommended cleaning tips and your vacuum still isn't performing, or if you suspect a motor issue, electrical problem, or complex internal blockage, it's time to consider professional cleaning services or a dedicated vacuum repair shop. Attempting complex repairs without the right tools or knowledge can void warranties and cause further damage. A good technician can diagnose the problem accurately and often extend your vacuum's life for many more years, making it a worthwhile investment.
Choosing the Right Tools for Maintenance and Maximizing Efficiency
Equipping yourself with the right tools makes vacuum maintenance a breeze. You don't need a professional workshop, but a few key items will be invaluable. A good pair of sharp scissors or a seam ripper for brush roll cleaning, a small stiff-bristled brush for filter dusting, and a can of compressed air for blowing out crevices and hard-to-reach spots are highly recommended. For exterior cleaning, a damp cloth with a mild, eco-friendly cleaner can keep the casing looking new without using harsh chemicals that could damage plastics. Additionally, proper storage—keeping your vacuum in a clean, dry place—prevents dust buildup and accidental damage.
Consider also how your cleaning habits affect your vacuum. Regularly picking up larger items by hand before vacuuming reduces the risk of clogs. For very fine dust, like drywall dust, using a shop vac or a specialized bag for fine particles will protect your household vacuum's motor and filters. These small adjustments in routine can significantly impact your vacuum's longevity and efficiency.
Conclusion: Invest in Longevity, Enjoy Peak Performance
Your vacuum cleaner is an indispensable tool in maintaining a clean and healthy home. By embracing these essential maintenance cleaning tips, you're not just preventing breakdowns; you're actively ensuring your investment delivers peak performance for years to come. From simple post-use emptying to quarterly deep cleans and knowing when to seek professional help, each step contributes to the longevity and efficiency of your machine. Regular maintenance is a vital part of comprehensive home maintenance, ensuring that your vacuum is always ready to tackle any mess, making your cleaning tasks easier and more effective. Make these habits a part of your routine, and enjoy the peace of mind that comes with a perfectly functioning vacuum cleaner.