
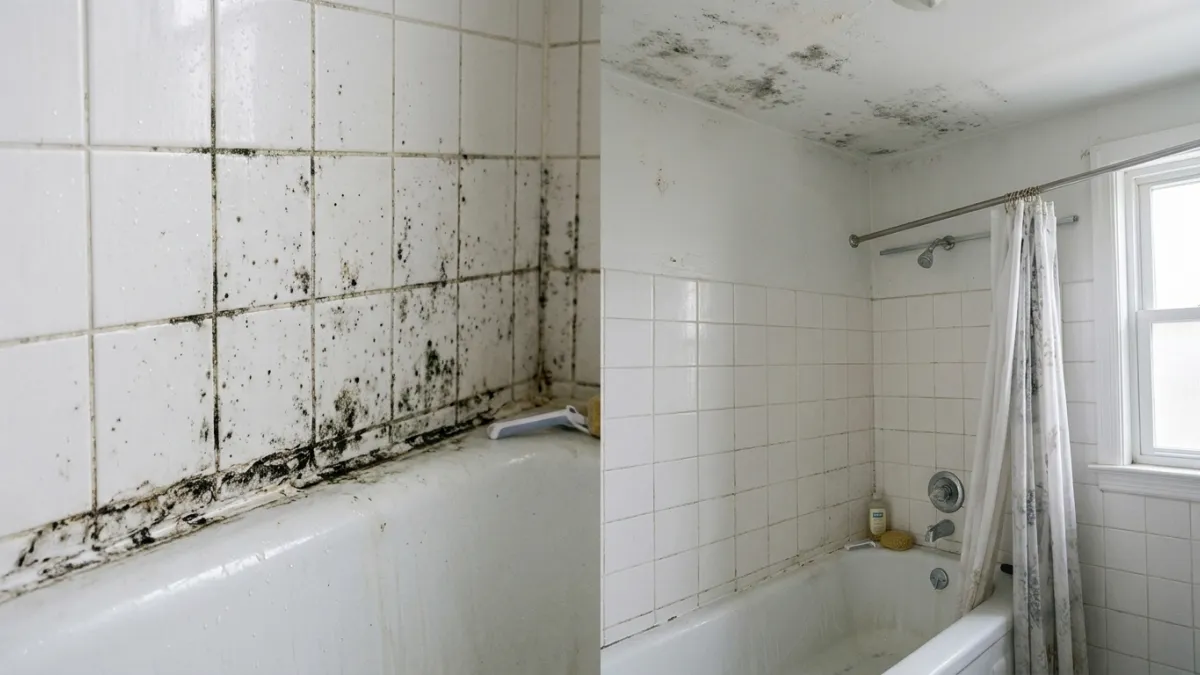
Quick answer: Removing bathroom mold effectively requires tailored chemical approaches based on the surface: use an alkaline sodium hypochlorite solution (diluted 1:10) or specialized hydrogen peroxide cleaner on porous grout, treat silicone seals with a soaked cotton coil method, and use an anti-fungal EPA-registered disinfectant or distilled white vinegar (5% acetic acid) on painted ceilings to prevent drywall damage.
Understanding Mold vs. Mildew on Different Bathroom Surfaces
Homeowners frequently use the terms "mold" and "mildew" interchangeably, but identifying the exact growth pattern dictates your removal strategy. Mildew is typically a superficial fungal growth that appears flat, powdery, or downy, usually colored white, gray, or light yellow. It sits strictly on the surface of non-porous tiles and easy-to-clean fixtures. Mold, on the other hand, penetrates deeper into porous structures, presenting as fuzzy, slimy, or deeply embedded black, dark green, or red patches. Understanding how these organisms attach to structural substrate is essential for executing a successful deep cleaning routine.
The structural vulnerability of your bathroom varies by material. Cementitious grout is extremely porous, drawing in moisture and organic matter like body oils and dead skin cells. Silicone sealants are non-porous on the surface, but once the sealant degrades or lifts from the tile boundary, moisture becomes trapped behind the bead, feeding mold from the inside out. Drywall ceilings represent the most delicate challenge: standard drywall absorbs water quickly, meaning heavy moisture accumulation allows fungal hyphae to sink deep into the paper backing and gypsum core.
Before launching into any mold remediation, equipping yourself with appropriate safety gear is mandatory. Standard domestic house cleaning can kick spores into the air, causing respiratory irritation or allergic reactions. Always wear nitrile gloves, protective safety goggles, and an N95 respirator mask during scrub sessions. Ensure active ventilation by opening window openings or running an exhaust fan rated at minimum 50 to 100 CFM (cubic feet per minute) during and after treatment.
Targeted Remediation for Tile Grout and Silicone Seals
Cleaning porous tile grout requires balanced chemical action combined with mechanical scrubbing. Standard off-the-shelf cleaners often fail because they lack sufficient contact time or the proper active ingredients. For heavy mold contamination on cement grout, an alkaline solution containing 0.5% to 1.0% sodium hypochlorite (household liquid bleach diluted 1:10 with water, pH around 11 to 12) or a dedicated oxygen bleach solution (sodium percarbonate mixed with hot water at 60°C/140°F) works best. Oxygen bleach breaks down into hydrogen peroxide and soda ash, lifting organic stains safely without stripping grout color.
Cleaner's tip: Never use stiff wire brushes on cementitious tile grout. Steel bristles break down the delicate top skin of the grout line, opening up micro-fissures that absorb mold spores twice as fast in the future. Instead, use a specialized nylon grout brush with dense bristles (300 to 400 GSM microfiber cloths for wiping) and allow your cleaning solution a minimum dwell time of 15 to 20 minutes before agitation.
Silicone sealants demand a vastly different approach. Once mold grows beneath a silicone bead, conventional scrubbing only removes surface discoloration while the main fungal body remains protected underneath. To treat surface-level mold along silicone edges, soak a thick cotton coil or rolled paper towel strips in a 3% hydrogen peroxide solution or diluted bleach, press it directly onto the caulk line, and leave it overnight (8 to 12 hours). If mold has penetrated behind the silicone, mechanical removal is the only permanent solution. Cut out the old caulk using a razor scraper, sanitize the gap with isopropyl alcohol (70% concentration), let it dry for 24 hours, and re-apply a 100% silicone sealant containing built-in anti-microbial protection (such as GE Advanced Silicone 2 or DAP Kwik Seal Ultra).
| Surface Type | Recommended Cleaner / Active Agent | Contact / Dwell Time | Scrubbing Tool |
|---|---|---|---|
| Cement Grout | Oxygen Bleach (Sodium Percarbonate) or 1:10 Bleach Dilution | 15 – 20 Minutes | Stiff Nylon Bristle Brush |
| Silicone Seals | 3% Hydrogen Peroxide or Concentrated Bleach Gel | 8 – 12 Hours (Soaked Strip) | Non-Abrasive Sponge / Cotton Coil |
| Painted Ceiling | Distilled White Vinegar (5% Acetic Acid) or EPA Disinfectant | 10 – 15 Minutes | Flat Microfiber Mop (250-350 GSM) |
| Acrylic Tubs & Tile | Neutral pH Surface Cleaner or Baking Soda Paste | 5 – 10 Minutes | Soft Microfiber Cloth or Sponge |
Eradicating Mold and Mildew from Bathroom Ceilings
Ceiling mold is almost exclusively caused by localized condensation. As warm, moist air rises from hot showers, it strikes the cool ceiling surface, forming liquid water droplets that settle into porous paint films. Removing these spots requires delicate handling to prevent stripping latex paint or pushing liquid water further into the drywall sheet rock.
Avoid applying aggressive sodium hypochlorite solutions to painted ceilings whenever possible; strong bleach degrades standard ceiling paint and leaves behind salty residues that attract ambient moisture. Instead, opt for distilled white vinegar (containing 5% acetic acid, pH ~2.4) or an EPA-registered fungicide. Spray the vinegar solution directly onto the affected ceiling spots without oversaturating the drywall. Allow a contact time of at least 15 to 30 minutes to permit the acid to disrupt the cellular membrane of the fungal spores.
To safely clean without working directly overhead on a ladder, use a telescopic flat microfiber mop (using a medium-density 300 GSM microfiber pad). Gently wipe the damp ceiling in long, overlapping straight lines. Do not scrub vigorously in circles, as this can tear softened ceiling paint. Once clean, dry the ceiling surface thoroughly using a fresh, dry microfiber cloth attached to your mop pole. If the mold has penetrated through the paint coat into the drywall core, you will need to scrape the flaking paint, apply a stain-blocking antimicrobial primer (such as Zinsser Mold Killing Primer), and repaint with a semi-gloss or satin moisture-resistant finish.
Preventative Maintenance and Long-Term Humidity Control
Removing existing growth is only half the battle; preventing recurrence requires strictly controlling the bathroom environment. Relative humidity (RH) inside a residential bathroom should consistently remain below 50%. When ambient indoor humidity stays above 60% for prolonged periods, mold spores germinate in as little as 24 to 48 hours. Installing a digital thermo-hygrometer near your shower enclosure gives you immediate feedback on moisture retention.
Maintaining active mechanical ventilation is critical. Ensure your exhaust fan operates at adequate capacity for the room volume. A general standard is 1 CFM per square foot of bathroom space. Run the exhaust fan continuously during your bath or shower and keep it running for at least 20 to 30 minutes after you finish. If your current fan lacks an automatic timer, replace the standard wall switch with a digital countdown timer switch or a smart humidity sensor switch (such as Leviton IPHS5) that triggers automatically when moisture levels spike.
Integrate simple daily cleaning habits into your household routine to keep mold at bay. Keep a squeegee inside the shower stall and wipe down glass panels, smooth wall tiles, and silicone joints after every single use. This simple 60-second habit removes up to 80% of standing surface water. Additionally, seal cement grout lines annually using a high-quality fluoropolymer-based penetrating grout sealer (such as Miracle Sealants 511 Impregnator) to create a hydrophobic barrier that prevents water and soap scum from soaking into the substrate.
Safety Protocols and Eco-Friendly Alternatives
When performing heavy deep cleaning in enclosed sanitary spaces, safety precautions cannot be overstated. A critical chemical safety rule every homeowner must remember: NEVER mix chlorine bleach with ammonia, vinegar, or acidic bathroom cleaners. Mixing bleach with acids produces toxic chlorine gas ($Cl_2$), while mixing bleach with ammonia creates dangerous chloramine vapors ($NH_2Cl$), both of which cause severe respiratory injury and eye burn hazard.
If you prefer eco-friendly cleaners or wish to avoid synthetic chemical fumes, natural remedies can yield impressive results when applied correctly. Tea tree oil (Melaleuca alternifolia) is a powerful natural fungicide. Mix 1 teaspoon of pure tea tree oil with 1 cup of water in a spray bottle, apply it generously to mold-prone grout, and let it dry completely without rinsing. The residual Australian tea tree terpenes create an inhospitable environment for fungal spores.
Another excellent eco-friendly strategy involves baking soda (sodium bicarbonate) combined with hydrogen peroxide. Baking soda acts as a mild, non-abrasive scrubbing agent with a slightly alkaline pH (around 8.3) that softens soap scum, while 3% hydrogen peroxide provides non-toxic oxidation. Mix them into a thick paste, apply to tile grout lines with a soft nylon brush, allow 15 minutes of dwell time, and rinse thoroughly with clean warm water.
Select your cleaning approach based on your specific situation: for immediate surface mildew on non-porous tiles, eco-friendly vinegar or hydrogen peroxide works exceptionally well. For deeply embedded black mold in clear silicone sealant, mechanical replacement with fresh antimicrobial sealant is mandatory. Your primary focus must always begin with immediate humidity control through proper exhaust ventilation—without addressing moisture, even professional cleaning services will only provide temporary relief.
Frequently Asked Questions
Why does mold keep coming back on my bathroom silicone seals?
Mold recurs on silicone seals primarily because water gets trapped behind damaged or lifting sealant beads, or because the internal anti-fungal additive in old silicone has completely leached out. Once fungal hyphae grow into the structural matrix of the silicone, surface cleaning cannot destroy the root. Complete removal and re-caulking with 100% silicone is required.
Is vinegar or bleach better for killing mold on bathroom ceilings?
Distilled white vinegar (5% acetic acid) is generally superior for painted bathroom ceilings. Chlorine bleach degrades standard ceiling paint, leaves behind sodium salt residues that attract ambient humidity, and only removes color on surface materials without penetrating porous substrates like drywall paper backing.
How long should I leave oxygen bleach on grout before scrubbing?
Oxygen bleach (sodium percarbonate solution) requires a dwell time of 15 to 20 minutes to effectively break down organic bonds and loosen fungal spores. Keep the surface moist during this dwell period by re-spraying light mists of the solution before scrubbing with a nylon brush.
Can I clean mold off my ceiling using a steam cleaner?
While high-temperature vapor steam cleaners (operating at 130°C/266°F or higher) effectively sanitize non-porous tiles and grout, they should be used with extreme caution on painted ceilings. Excessive heat and direct steam pressure can cause drywall paper to delaminate, bubble ceiling paint, or force moisture deep into the plaster board.
Sources
- U.S. Environmental Protection Agency (EPA) - Mold and Moisture Guidance
- Centers for Disease Control and Prevention (CDC) - Controlling Mold in the Home
- Occupational Safety and Health Administration (OSHA) - Chemical Safety Data Sheets for Sodium Hypochlorite and Hydrogen Peroxide
Looking for the Right Supplies?
Check out our verified Top Cleaning Products & Tools on Amazon.
As an Amazon Associate, we earn from qualifying purchases.